 All you need are some scraps of paper to make these super cute spring and Easter decorations. You don’t need any fancy tools, but, you can use them if you have them. Use your scrapbook paper, cardstock, construction paper – anything you can find. This would be a fun craft to do with the kids. Have fun and Happy Springtime!
Supplies:
For the Bunny:
• White Cardstock or Scrapbook Paper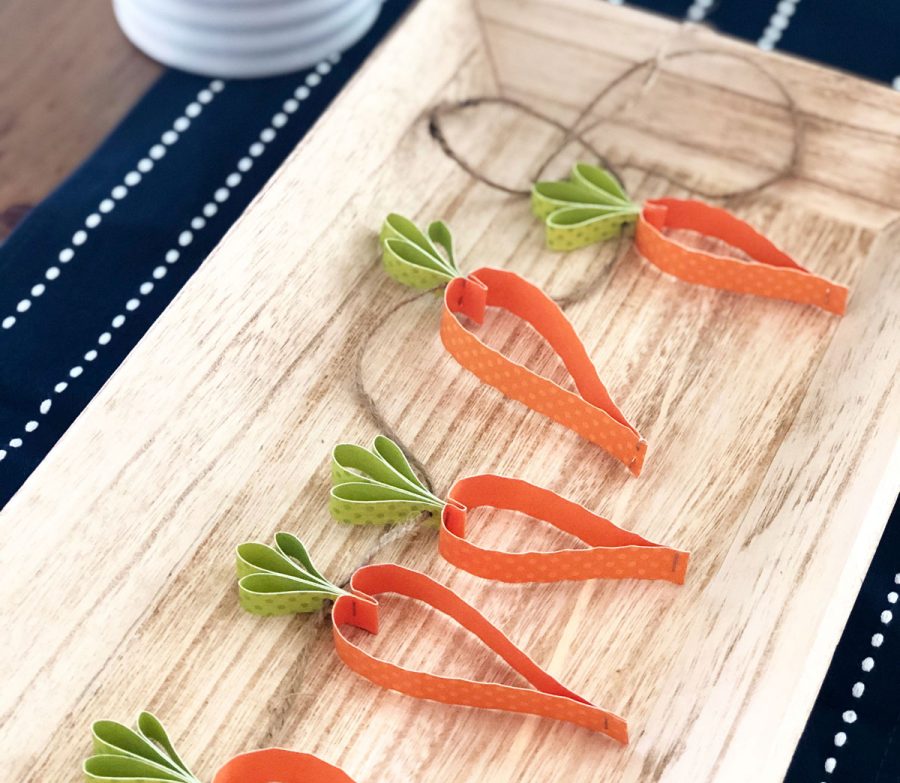
• Pink Cardstock or Scrapbook Paper
• White pompom or cotton ball
For the Carrot:
• Green Cardstock or Scrapbook Paper
• Orange cardstock or Scrapbook paper
Optional:
Bunny Directions:
1. Cut paper the measurements shown in the photo below.
2. Loop Ear strips together and fold body strip in half.
3. Staple ears to the middle of the body strip.
4. Then staple the body strip at the bottoms to make a circle.
5. Glue pompom to the bottom of your bunny and you have a cotton tail!
6. Punch a hole at the bottom of the ears to add to a banner.
Carrot Directions:
1. Cut paper the measurements shown in the photo below.
2. Loop carrot strips together and fold the orange strip in half.
3. Staple carrot leaves to the middle of the carrot strip.
4. Then staple the carrot strip at the bottom.
5. Punch a hole at the bottom of the carrot leaves to add to a banner.

Save and Share
MAKE-N-TAKES ARE BACK
2-4PM Every Saturday
Saturdays from 2-4PM Craft Warehouse hosts a special, in-store Make-N-Take event at ALL locations. Come Check it out!
View Events by Location
Meridian, ID | Beaverton, OR | Gresham, OR | Salem, OR | Hazel Dell, WA | Kennewick, WA | Vancouver, WA
Upcoming Events

April 17 - April 29
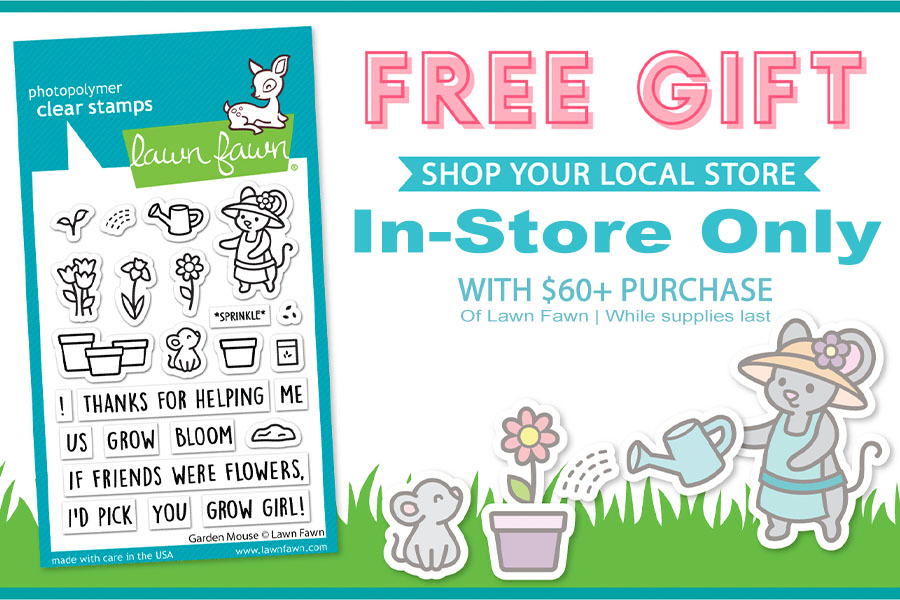
Attention, Lawn Fawn fans! Take a creative journey and visit one of our inspiring locations for an exclusive promo event happening from April 17th to April 29th! Purchase any Lawn Fawn products totaling $60 or more In-Store, and receive a FREE gift!* This special gift, [...]
May 25 @ 2:00 pm - 4:00 pm
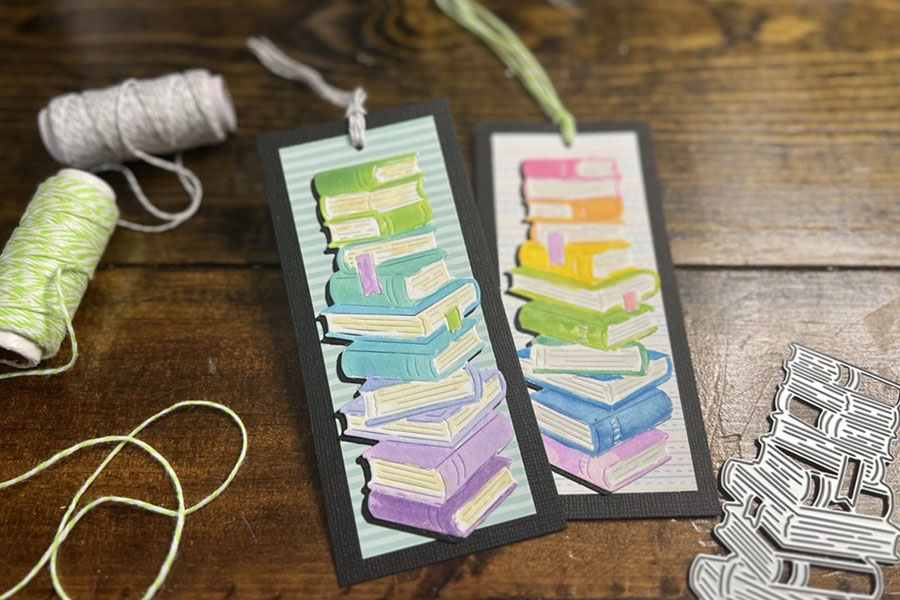
Join us at all store locations! Fun and easy watercolor technique to quickly color die cut of stacked books. During this event we will show you a simple way to create your own faux watercolors with ink pads. Add some cute paper and turn it [...]
More from Our Create Blog

This pretty scarf was made with the Canyon Colors by [...]

Check out this delightful and hassle-free baby blanket pattern from [...]

Faux plants in a shadow box frame can bring a [...]


All you need are some scraps of paper to make [...]

This cheery, charming, and pretty Valentine's Envelope Garland is just [...]

Have you heard of knitting or crocheting a Temperature Blanket? [...]

Temperature Blankets have been a fun trend. When making a [...]


A fun, easy project to do with family & friends [...]

Are you Ready for the next concert, concert movie, or [...]