 You’ll have sweet dreams with this Mountain Pillow made from Cuddle fabric that is so soft and comfy. This is a sweet pillow for home decor, too. Click on the project sheet for the directions and a template.
Supply List:
• One white Cuddle® FQ
• One Cuddle® FQ, the color of your choice for the lower portion of the mountain
• One bag of Fairfield Poly-fil®
• Stretch/ballpoint/universal jeans needle, 90/14
Optional:
Walking foot or many long pins
Read through the entire pattern before beginning. If possible, lighten the pressure on your presser foot a bit. Stitch length should be 3.0. Use a 1/2” seam allowance. If you are cutting each side one at a time, rather than double the fabric and cutting two pieces at once, remember to flip the pattern over when cutting the second piece.
Directions:
- Enlarge the pattern 200% or to the finished size, you desire. Enlarging it by this amount will result in a pillow approximately 18” x 15”.
- Using the entire mountain pattern, cut two from the FQ color of your choice. These will be the base of the mountain.
- Cut the pattern apart and with the white FQ, cut two snow or top of the mountain pieces.
- Pin the right side of the mountaintop pieces to the mountain, aligning edges. Stitch only the inner edges of the mountaintop to the mountain. If your machine is unable to stitch through 4 thicknesses of Cuddle, only use one mountaintop piece.
- With wrong sides together, pin and sew the entire mountain together, leaving 4” opening on the bottom.
- Fill with Poly-Fil.
- Stitch the opening closed.
WORKING WITH CUDDLE® TIPS AND HINTS
- Don’t clean your sewing area until you are done with the Cuddle® Project. ?
- Use a 90/14 Stretch or 90/14 Universal needle. If you use a Sharps or Microtex, it will cut the fabric thread and cause the fabric to “run”.
- Use a 3.5 or 4.0 stitch length.
- A walking foot is VERY helpful. It moves the top layer of Cuddle® at the same time the bottom layer is being fed by the feed dogs.
- If the top layer of Cuddle® is stretching more than the bottom layer, lighten the pressure on the pressure foot.
- A supply of long pins (like Flat Flower Pins) is a necessity. Use them every 1”-2”. Even if you are using a walking foot, use many pins. Cuddle® likes to curl; pinning often helps hold it down so you are able to maintain a more consistent seam allowance.
- Sew slowly!
- Use the “needle down” option or stop with the needle down into the fabric.
- If using the Stitch and Flip method to create your blanket, be sure to use 505 Spray. Just a light spray is all you need.
- I didn’t want the added weight of quilt batting in my Cuddle® blanket, so I used unbleached muslin as my base. I did pre-wash and dry the muslin, but not the Cuddle®. Cuddle® is a polyester fabric and doesn’t shrink. If you choose to use quilt batting, use a polyester batting.
- When it came time to sew the binding on, Wonder Clips® were easier to use than pins.
- Shannon Fabrics recommends using a ½” seam allowance when sewing the binding onto the back of the blanket. I would make it a scant ½” or cut the binding at 1-7/8” rather than 1-3/4” they recommend.
Save and Share
MAKE-N-TAKES ARE BACK
2-4PM Every Saturday
Saturdays from 2-4PM Craft Warehouse hosts a special, in-store Make-N-Take event at ALL locations. Come Check it out!
View Events by Location
Meridian, ID | Beaverton, OR | Gresham, OR | Salem, OR | Hazel Dell, WA | Kennewick, WA | Vancouver, WA
Upcoming Events

April 17 - April 29
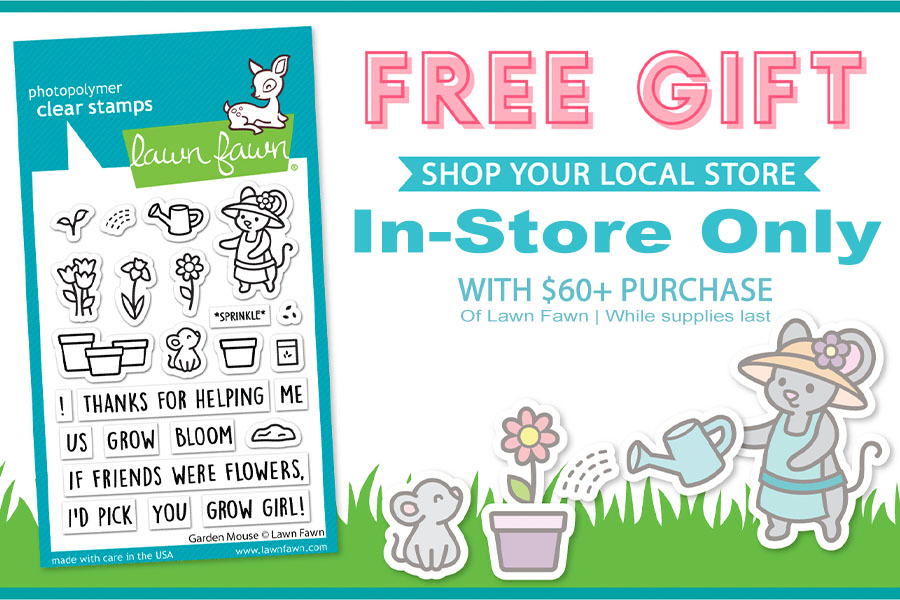
Attention, Lawn Fawn fans! Take a creative journey and visit one of our inspiring locations for an exclusive promo event happening from April 17th to April 29th! Purchase any Lawn Fawn products totaling $60 or more In-Store, and receive a FREE gift!* This special gift, [...]
May 25 @ 2:00 pm - 4:00 pm
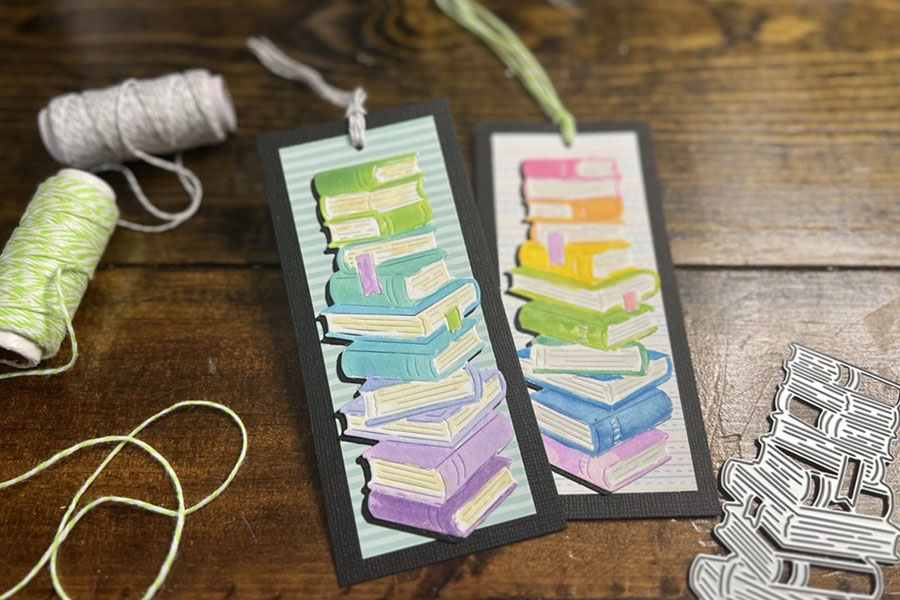
Join us at all store locations! Fun and easy watercolor technique to quickly color die cut of stacked books. During this event we will show you a simple way to create your own faux watercolors with ink pads. Add some cute paper and turn it [...]
More from Our Create Blog

This pretty scarf was made with the Canyon Colors by [...]

Check out this delightful and hassle-free baby blanket pattern from [...]

Faux plants in a shadow box frame can bring a [...]


All you need are some scraps of paper to make [...]

This cheery, charming, and pretty Valentine's Envelope Garland is just [...]

Have you heard of knitting or crocheting a Temperature Blanket? [...]

Temperature Blankets have been a fun trend. When making a [...]


A fun, easy project to do with family & friends [...]

Are you Ready for the next concert, concert movie, or [...]